Building Your Own Plywood Fishing Boat: A DIY Adventure
Hey there, fellow boat lovers and DIY enthusiasts! So you're dreaming of a custom-built plywood boat perfect for fishing and weekend fun on the water? That's awesome! Building your own boat is a rewarding project, a true test of skill and patience, and the end result? Pure satisfaction (and a sweet ride!). Let's dive in!Planning Your Plywood Fishing Boat
Choosing Your Design
First things first: decide what kind of boat you want! Do you need something stable for fishing, a nimble little skiff for exploring shallows, or something a bit more robust for carrying gear? There are tons of free plywood boat plans online â€" search for "free plywood boat plans" and you'll find a goldmine of designs. Consider the size based on your needs and building skills. Starting with a smaller, simpler design is a great way to gain experience before tackling a larger project.Gathering Your Materials
You’ll need marine-grade plywood â€" this is crucial! Regular plywood will rot and fall apart in the water. Get the thickness right for your design; it's usually specified in the plans. Other essentials include:- Epoxy resin and hardener (for waterproofing)
- Fiberglass cloth
- Wood screws (stainless steel is best)
- Wood glue (marine-grade, of course)
- Paint (again, marine-grade is a must!)
- Oars or a small outboard motor (depending on your design)
- Various tools: saw, drill, clamps, sandpaper, etc.
Building Your Boat: A Step-by-Step Guide
This part really depends on your chosen design, but here's a general overview:Cutting and Assembling the Hull
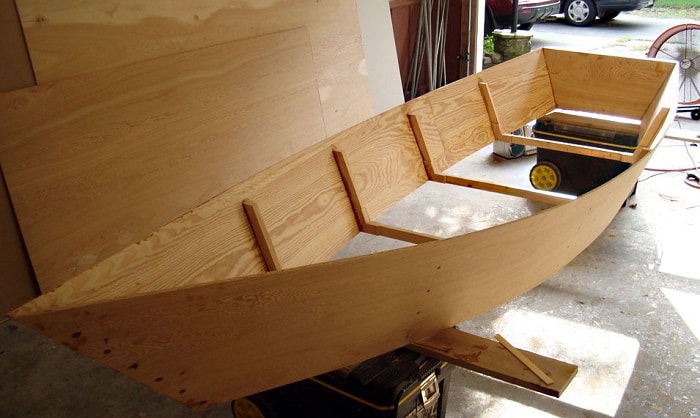
Carefully cut the plywood pieces according to your plans. Use sharp tools for clean cuts. Assemble the hull using wood glue and screws, clamping everything securely until the glue dries. Take your time; accuracy is key!Adding Stiffeners and Supports
Most plans will include frames and other supports to strengthen the hull. These are essential for preventing flexing and warping. Follow the instructions meticulously.Applying the Epoxy and Fiberglass
This is where you create a waterproof seal. Apply several layers of epoxy, embedding fiberglass cloth in each layer to create a strong, waterproof shell. Make sure to follow the epoxy manufacturer's instructions carefully. This step is crucial for the longevity of your boat.Finishing Touches
Once the epoxy has cured, sand the hull smooth and apply your chosen marine-grade paint. Add any necessary hardware, such as oarlocks or a motor mount.Testing and Launching Your Masterpiece!
Before launching, do a thorough inspection. Check for any leaks or weak points. Start with a test run in calm water, gradually increasing your speed and distance. Safety first! Always wear a life jacket, and never go out alone.Frequently Asked Questions
Q: How long does it take to build a plywood boat?
A: That depends entirely on the size and complexity of the design, as well as your experience level. A smaller boat could take a few weeks, while a larger one might take several months.
Q: Can I use regular plywood?
A: Absolutely not! Regular plywood will absorb water, rot, and quickly become unsafe. Always use marine-grade plywood.
Q: How much does it cost to build a plywood boat?
A: The cost varies considerably depending on the boat's size and the materials used. However, building your own will typically be significantly cheaper than buying a comparable factory-built boat.
Q: What if I make a mistake?
A: Don't worry! Everyone makes mistakes. Carefully assess the problem, and see if you can fix it. If not, you might need to start over, but it's a learning process!
Remember, building a boat is a journey. It's a chance to learn, create, and ultimately, enjoy the fruits of your labor on the water. Happy building!
Note: Only a member of this blog may post a comment.